It most certainly is possible. At Tecnatom we have performed inspections of this type using the Infrared Thermography (IRT) Technique, which we developed for the detection of possible cases of delamination in concrete structures. Indeed, this technique has already been tested and used at a nuclear power plant.
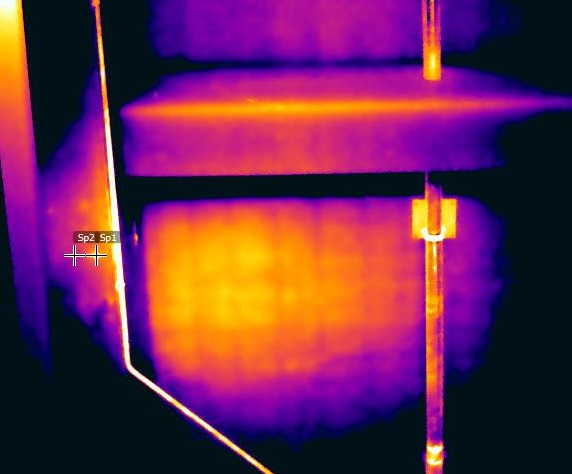
IRT is a Non-Destructive Testing (NDT) method that is used to analyse the infrared radiation emanating from the surface of a structure in order to obtain information on its interior.
What indications can you expect to find in an inspection?
IRT inspections are of special interest in civil works for the detection of anomalies, both on the surface of structures and beneath it (sub-surface anomalies) and allow for the detection of voids, delamination and cracking in concrete structures such as buildings, piping, bridges or road surfaces.
The procedure developed by Tecnatom allows for the detection of cases of sub-surface delamination measuring 10 x 10 cm and at depths of up to 3 cm, but the IRT technique may also be used to detect delamination at depths of up to 8 – 10 cm, depending on the conditions in which it is applied. This type of defects is usually caused by oxidization and rebar expansion, as the structure of the ceiling is of reinforced concrete.
How is IRT applied and how are the results evaluated?
For performance of the inspection, the scope of the technique was evaluated using different mock-ups manufactured with the type of indication postulated; in other words, a check was made to verify that the defects of interest could be detected. Following this, the inspection procedure was carried out, establishing the method to be used for performance of the inspection in the field and the equipment and personnel required to carry it out.
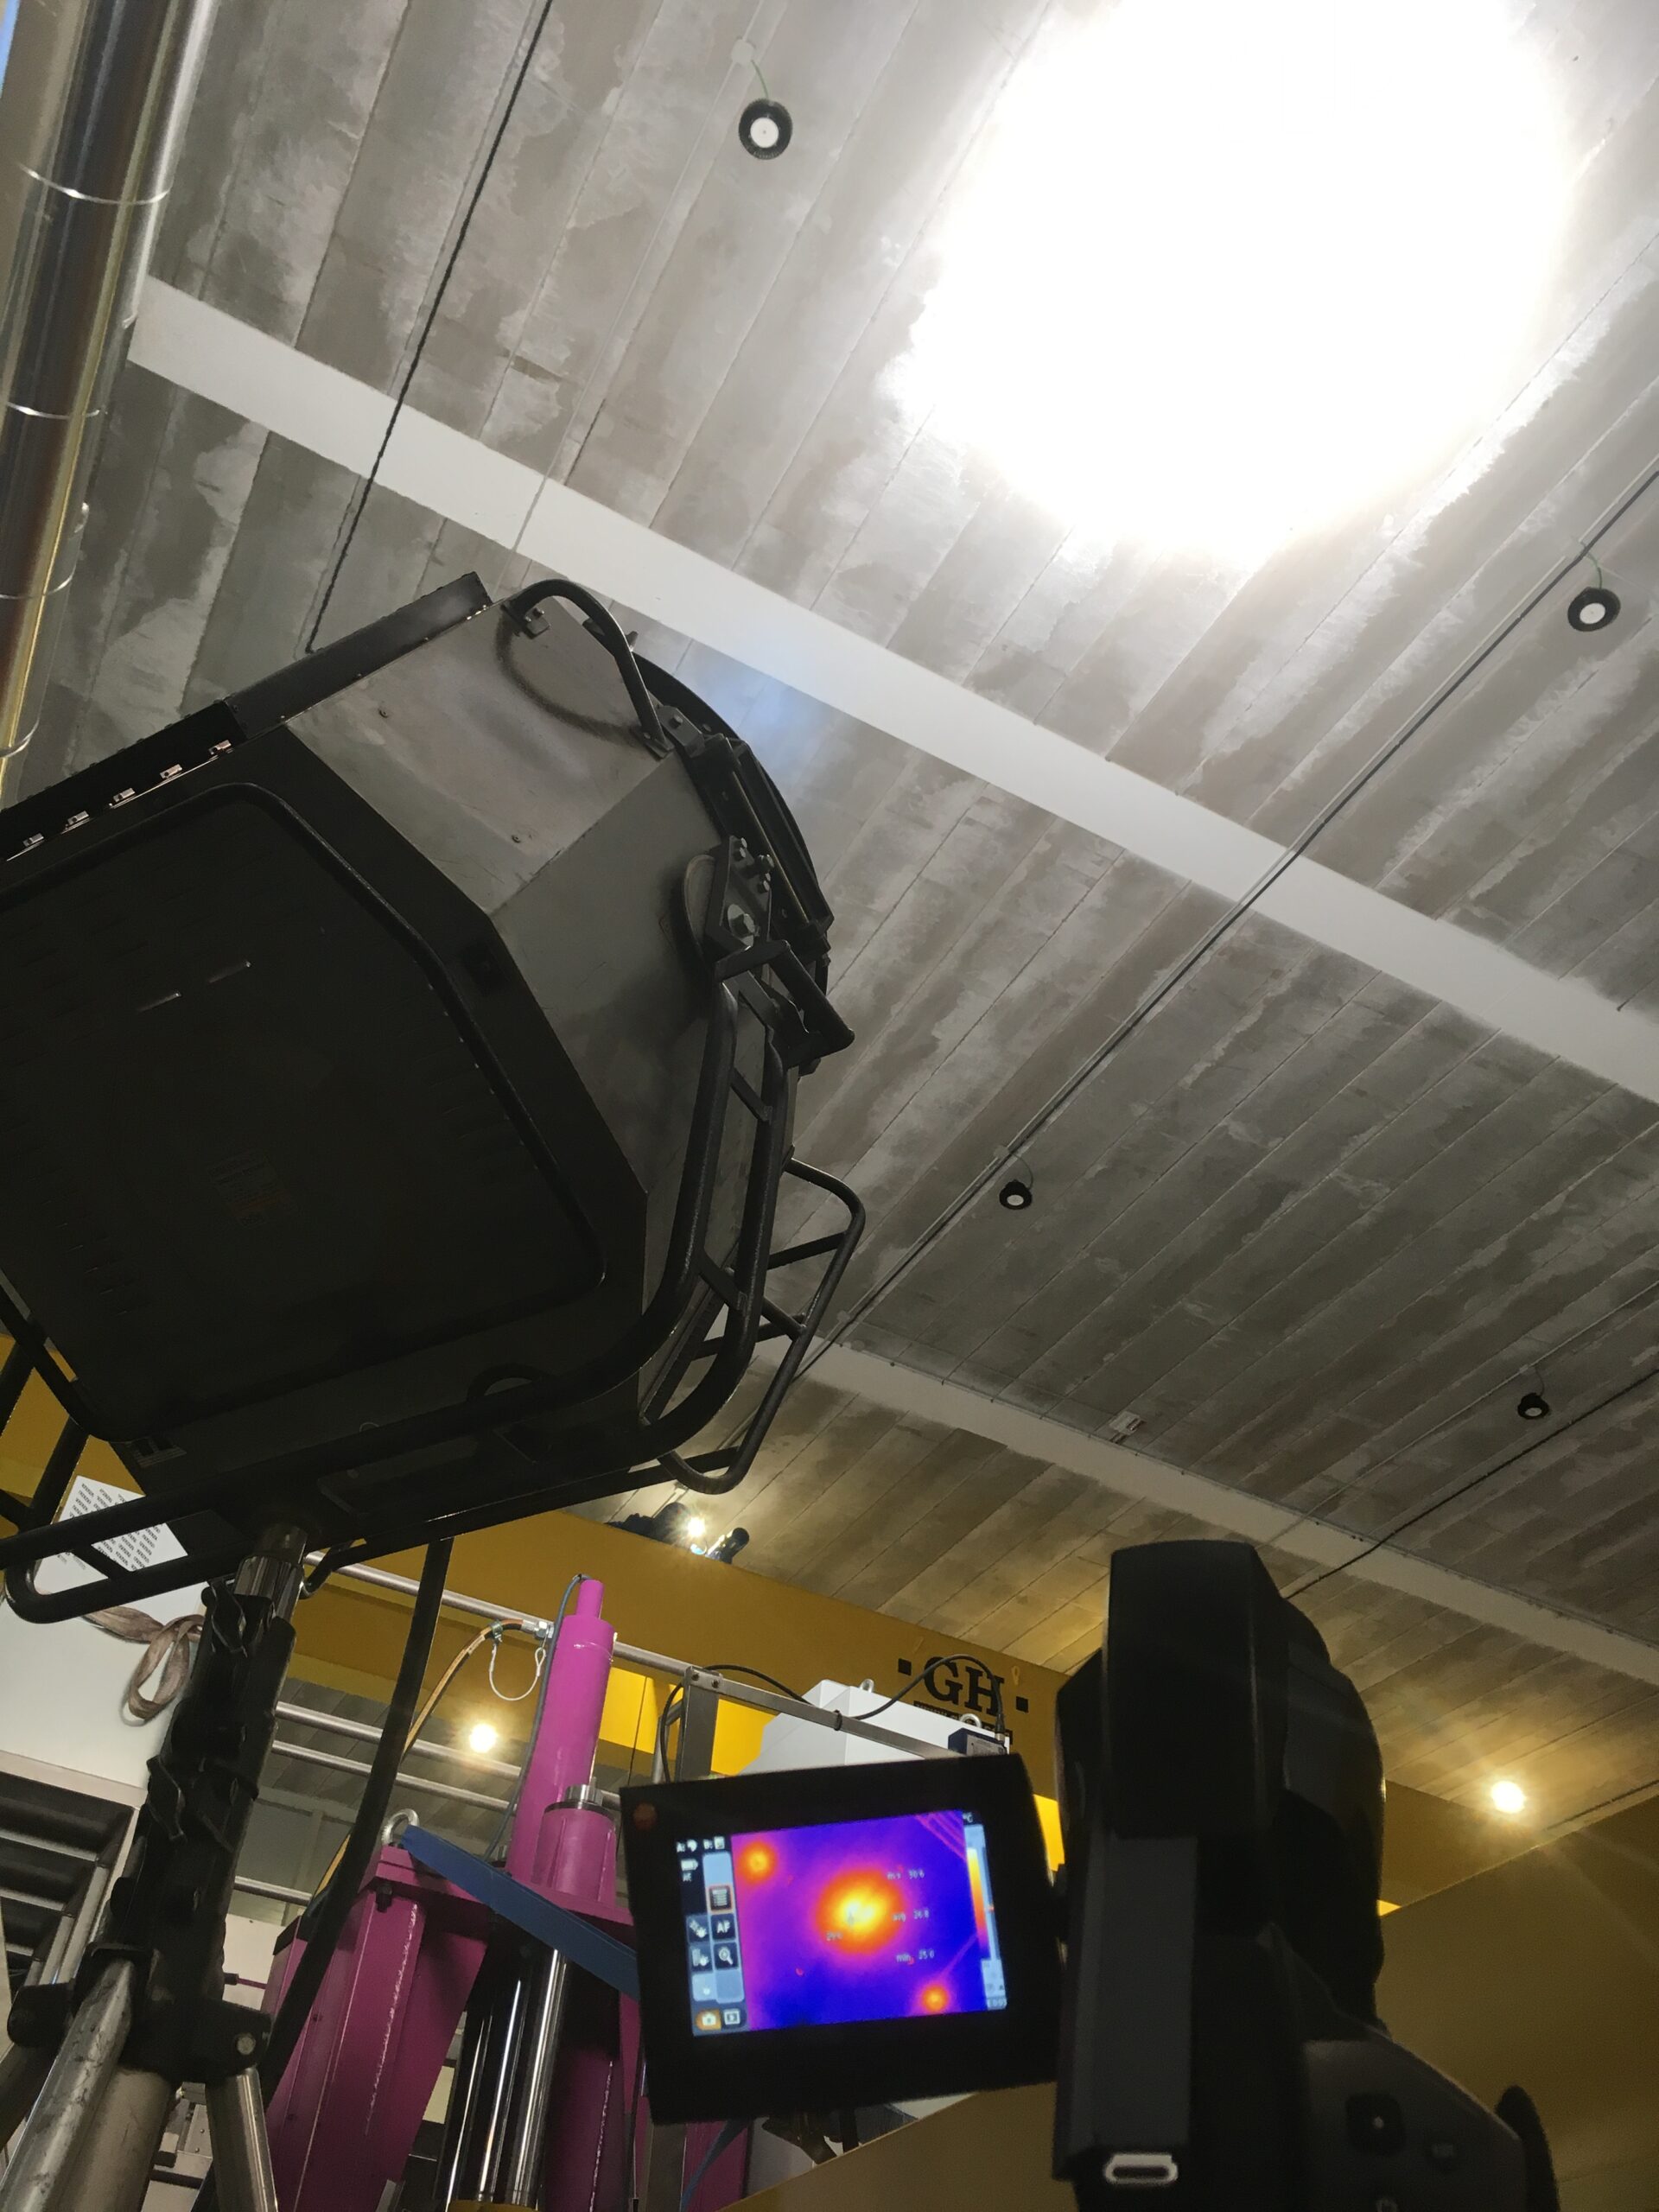
For performance of the inspection, the system was installed using active Infrared Thermography in a previously studied area in order to minimise the distance to the area inspected. This system consisted of two high power spotlights that were used to selectively heat a specific area of the ceiling while the evolution of its temperature was recorded using a high sensitivity infrared camera. This allows the evolution of the heating and cooling process to be recorded, with an individual examination being performed by IRT at each moment in time. In total, more than 90 individual inspections were carried out, each having a certain heating and cooling time depending on position.
Why is this inspection technique a challenge?
The main advantage of thermography for the inspection of concrete structures is that, along with visual inspection, it is the only method that allows inspections to be carried out remotely, without contact being maintained with the surface of the structure and covering a large area in each case. Its major advantage over visual inspection is that it allows for the detection of sub-surface anomalies. This technique has shown itself to be highly effective in terms of time and cost, as it is not necessary to assemble any type of structure in order to access the area to be inspected.
Although tests had been carried out previously using this technology, this has been the first time that the active Infrared Thermography Technique has been developed, validated and applied to actual buildings, such as the Spanish nuclear power plants, for the detection of sub-surface defects.
Development of the technique posed a challenge because of the conditions required (defect size and depth) and the limitations on accessibility and available inspection time. This new technique extends Tecnatom’s range of NDT solutions, as part of the company’s fundamental mission of supporting its clients with technological developments that allow them to operate their facilities in a safer and more efficient manner.
Author: Amador Sillero

